




I’ve been curious about shibari for years. Not necessarily for the reasons you might expect though. While rope bondage might conjure images of Fifty Shades of Grey, I’ve always been drawn to its more artistic side. Particularly the beautiful, feminine designs created by women, where rope is woven across the body, sometimes incorporating flowers and intricate patterns. Artists and riggers like Marie Sauvage have long been my go-to inspiration, proving that rope can be just as much about creativity and expression as it is about eroticism.
My curiosity grew while studying my Master’s in Sexology, when one of our classes introduced us to the history of shibari and included a live demonstration with a rigger and their rope partner. There was trust, communication and an almost meditative quality to the experience. I walked away appreciating that shibari is about far more than simply tying someone up.
More recently, my partner’s passion for shibari has brought it back into my world. We have attended a few community shibari rope drop-ins, which are a welcoming space for people at all stages of their shibari journey. They are an opportunity to meet other rope enthusiasts, share knowledge, practise techniques and, importantly, learn about safety from people with experience. Many communities also offer beginner friendly workshops to learn more about basic knots, nerves and anatomy to keep safe.
Read more: How do I ask for kinky sex? by David Hollingworth.
From restraint to rope art: a little shibari history
In this article:
Shibari is Japanese for “to tie” or “to bind”. Outside Japan, it’s often used as a broad term for Japanese-inspired rope bondage. You might also hear kinbaku, a term associated with more intimate, expressive Japanese rope traditions. Some people explore it for sensuality or BDSM, others for creativity, sensation or the simple pleasure of learning something new. Not every knot needs to lead to the bedroom.
Modern shibari has several influences, including hojōjutsu, historical Japanese techniques for restraining captives with rope. Over time, images of restraint appeared in theatre, art and erotic media. In the twentieth century, Japanese artists and practitioners developed increasingly expressive forms of kinbaku, which later influenced international rope communities. Today you’ll find rope in performances, photography, workshops and private relationships. Its roots are culturally specific, even as contemporary styles keep evolving.
Read more: What does BDSM stand for? by Amy Edith.
Meet the people behind the knots
In shibari, the rigger, or rope top, is the person doing the tying, while the rope bottom is the person being tied, actively communicating their comfort, desires and boundaries. You might also hear rope bottoms called bunnies or, my personal favourite, muses. There’s something rather romantic about being someone’s living artwork, don’t you think? And while shibari can involve power play, neither role automatically makes someone dominant or submissive.
Let’s talk shibari rope
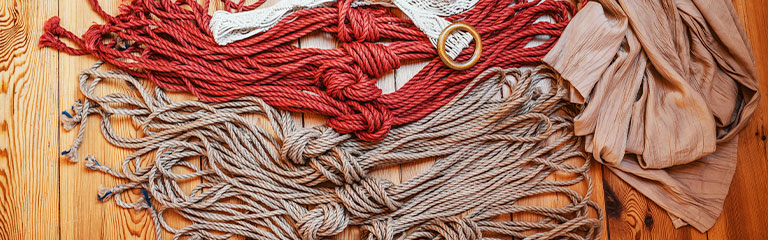
Not all ropes are created equal, especially when you’re planning to wrap them around someone! Cotton rope is soft, affordable and gentle against the skin, making it a popular choice for beginners, while synthetic ropes, such as nylon, offer a smoother, often more colourful alternative.
But jute is the darling of traditional Japanese style rope bondage, and for good reason. It’s lightweight, has a natural texture and offers just enough friction to help knots hold their shape. It also creates those beautiful, structured lines that make shibari so visually captivating. The downside? It can feel a little scratchy, requires proper care and isn’t automatically safer than other materials. For those drawn to the artistry of shibari, though, good quality, properly conditioned jute is a popular favourite.
Safety first, sexy second

Here’s the less glamorous but very important bit. Rope can compress nerves and blood vessels, strain joints and restrict movement. Consent is ongoing, not a one-off checkbox. Discuss health considerations, boundaries and a clear way to stop before you begin. Keep appropriate emergency shears within reach and never leave a restrained person alone. Ensure you are frequently checking for signs of numbness, tingling, weakness, pain or changes in colour or temperature. If you notice any of these, untie or cut immediately with shears or a safety knife. Avoid the neck, suspension and restrictive positions as a beginner. The safest first lesson is with an experienced, safety focused instructor.
Read more: Desires, fears, and boundaries by Morgan Penn.
Three shibari ties to know
These photographs document three rope arrangements I learned about. The notes beneath each image describe what’s visible and what to look for. They are not a complete, independently safe tying method. For hands on practice, learn placement, tension, anatomy and quick release in a supervised class.
1. Single column tie
The gateway knot of the rope world! A “column” refers to a single body part, such as a wrist or ankle. This simple but versatile tie is a great starting point for beginners and can open the door to all sorts of playful possibilities, from gently leading a consenting partner by the rope to exploring restraint against a bed frame. Just remember, attaching someone to furniture introduces additional safety considerations, so save that for when you’ve learned the ropes (pun intended!) with an experienced instructor.
Traditionally, shibari is tied with an 8 metre length of rope folded in the middle. The looped end is known as the bight, and the end with two ends is the working end as that is the end that you will be doing most of the work with.
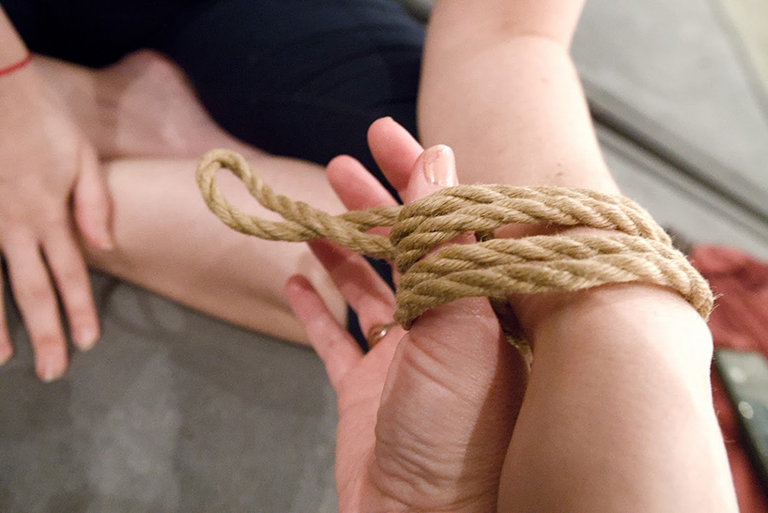
To start, make two, or three, wraps around the column (in this instance, the wrist) with the working end in the direction in which you wish to pull. The choice of two, three, or more wraps is one of comfort. The more wraps you do the more support the ropes provide.
Without getting too technical, this style of single column tie with a square knot is known as a collapsible single column tie. Depending on the direction that you pull your rope, the knot can change shape and fall apart. Wrapping the working end down the arm in the direction that you plan on pulling will result in an extra twist in the rope that keeps things nice and stable.
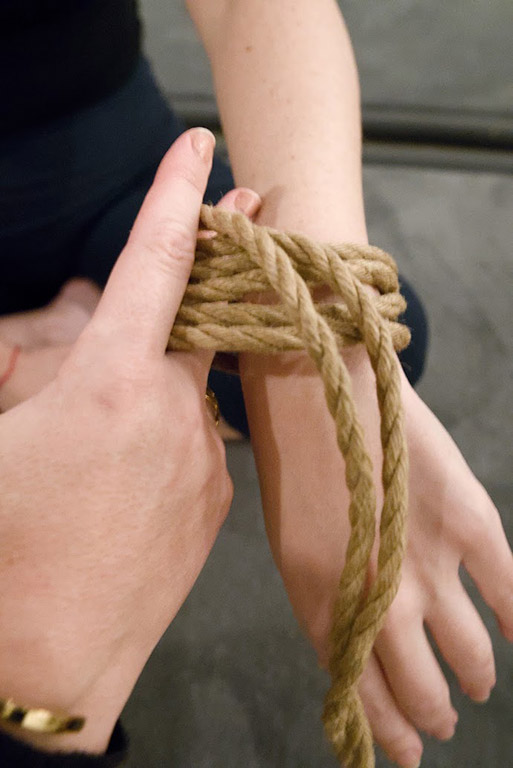
When you are learning it is completely fine, and even preferred, that the tie is on the looser end of the spectrum. Tension control will come with time, but we always want to keep the wraps loose enough to put a few fingers between the rope and the wrist.
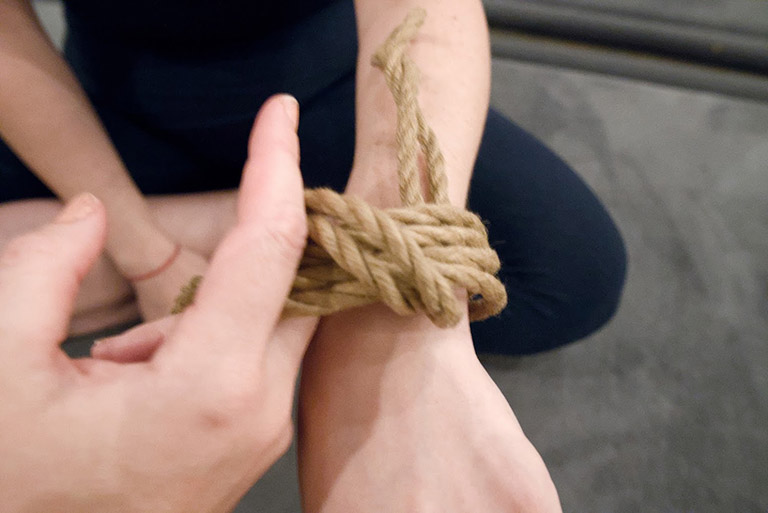
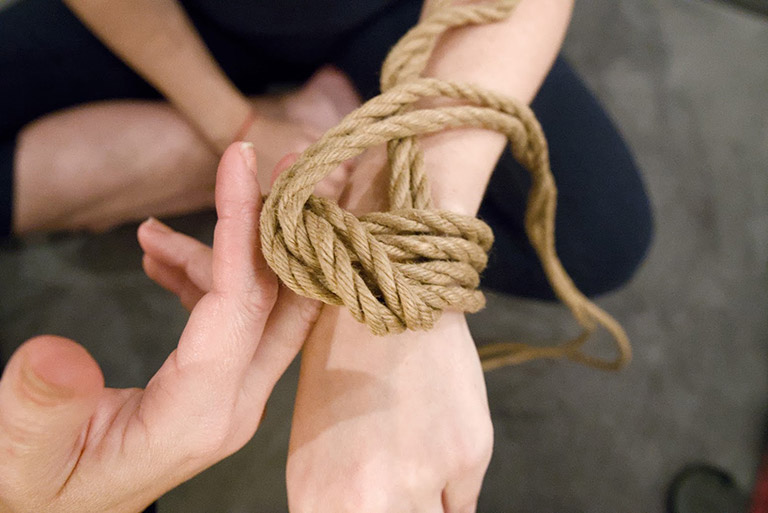
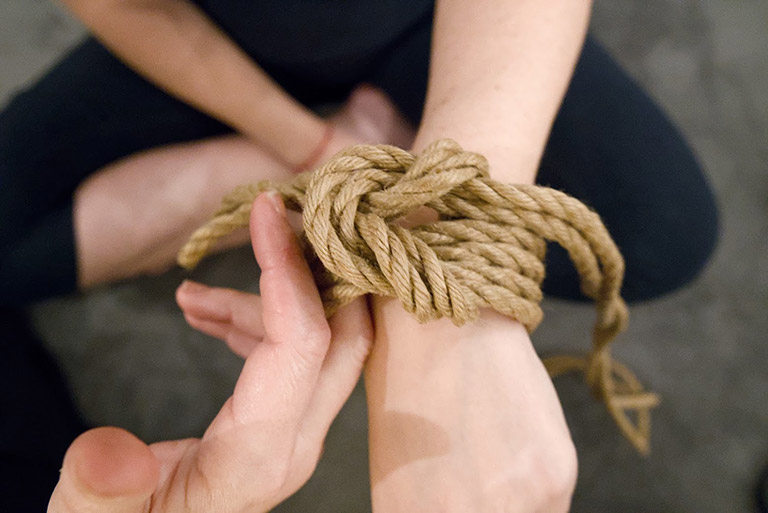
You should now be looking at the distinctive shape of a square knot. When you pull the bight and working ends tightly it should cinch down and look very regular.
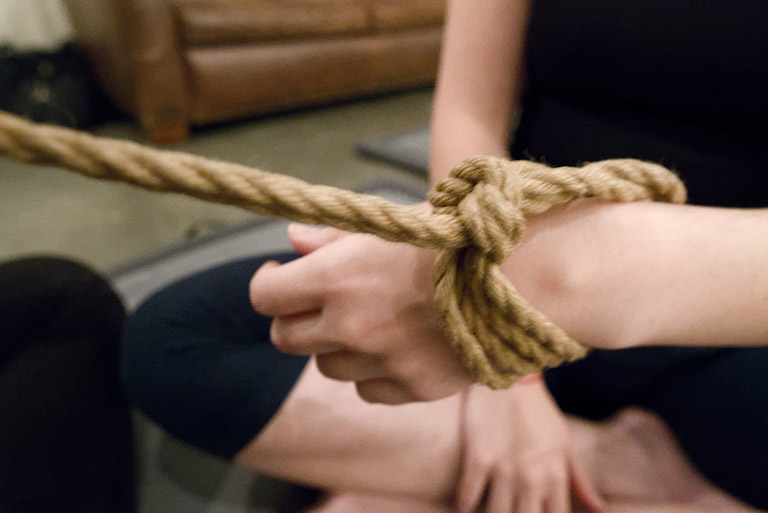
A completed single column tie effectively gives you a cuff of rope that can be secured to whatever you want. It can also be used as the basis for more complex rope work.
2. Double column tie
Two columns, one rope arrangement — and twice the reason to pay attention to comfort. A double column tie can join two wrists, but it also introduces spacing and pressure between body parts. Treat the images below as a visual tour, not an invitation to pull anything tight. If you want to learn to do this safely, please find a class.
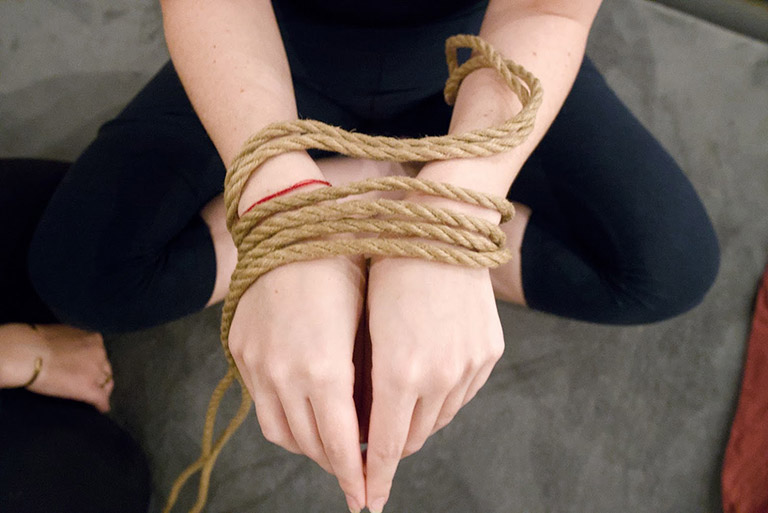
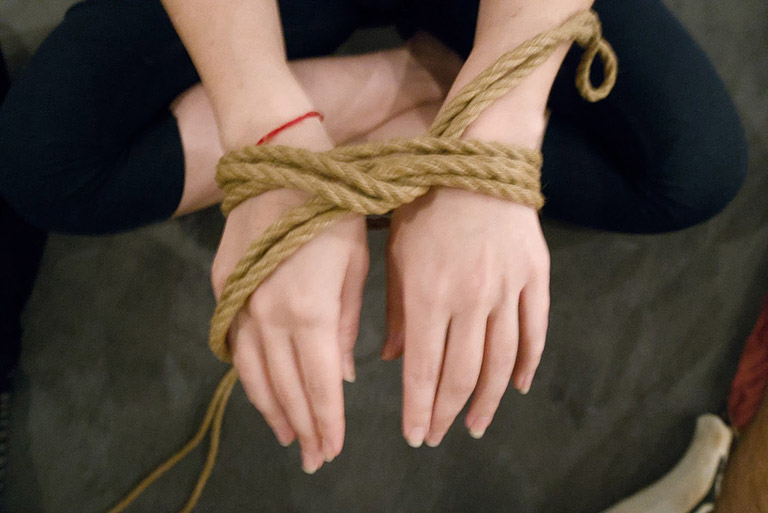
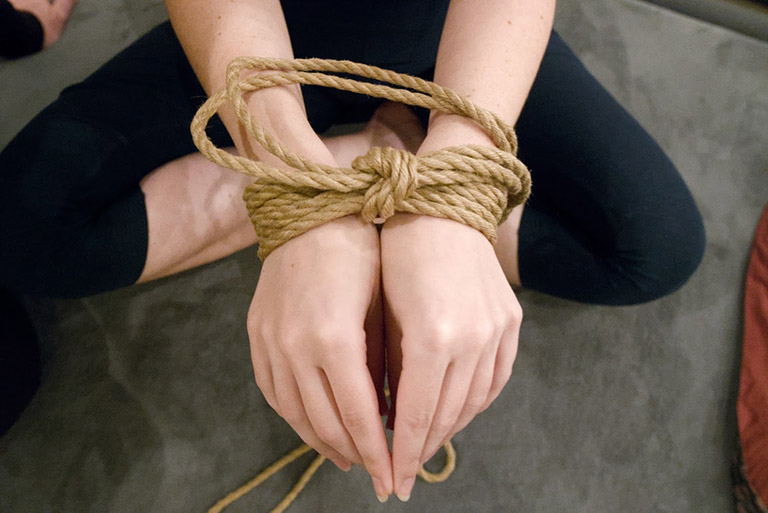
From here, either wrap around both columns and tie a knot, or tie a knot with the working end wrapping around the loops between the columns.
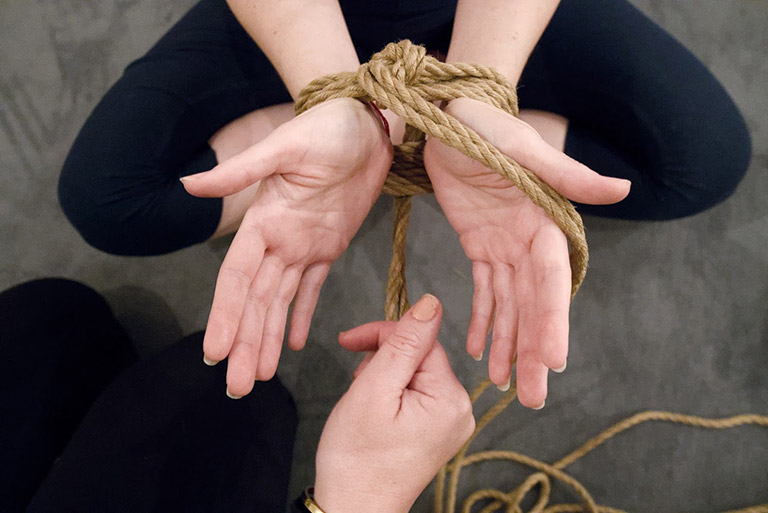
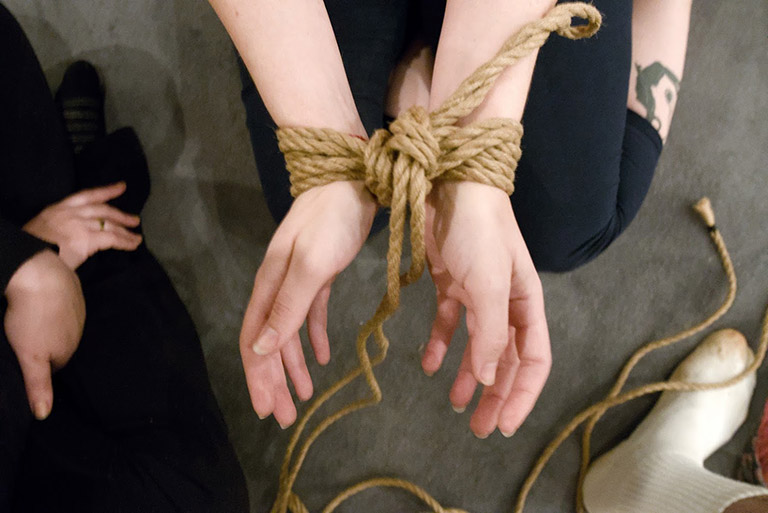
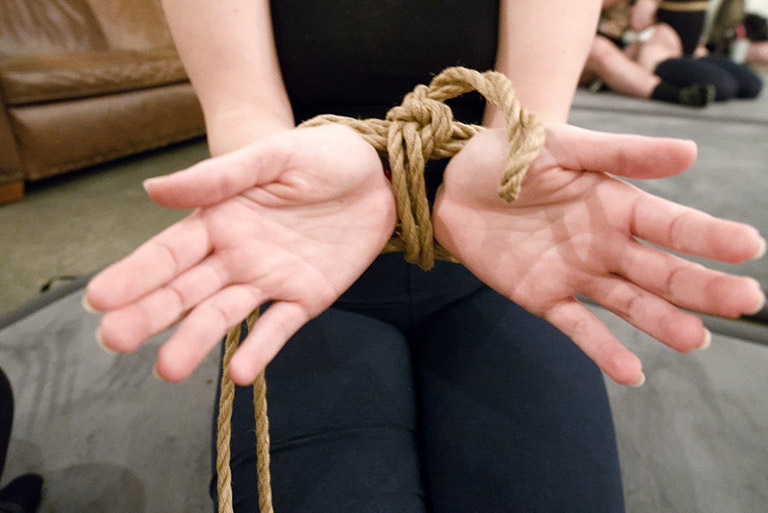
If you have left the initial wraps loose, looping the working end around the wraps multiple times can take out all the slack. Separating the single column tie into one knot to create the wraps and another to create the cinch helps keep control of how tight the ropes are around the wrists. This is true even when pulling on the working end of the rope – like if it were tied to a headboard.
3. Futomomo
Now for the dramatic one. Futomomo directly translates as “thigh” and commonly describes a bent-leg rope tie. Its layered lines are gorgeous, but the position can create significant pressure on nerves, circulation and joints. This should be an instructor-led technique and I recommend practising in a community setting before using it privately.
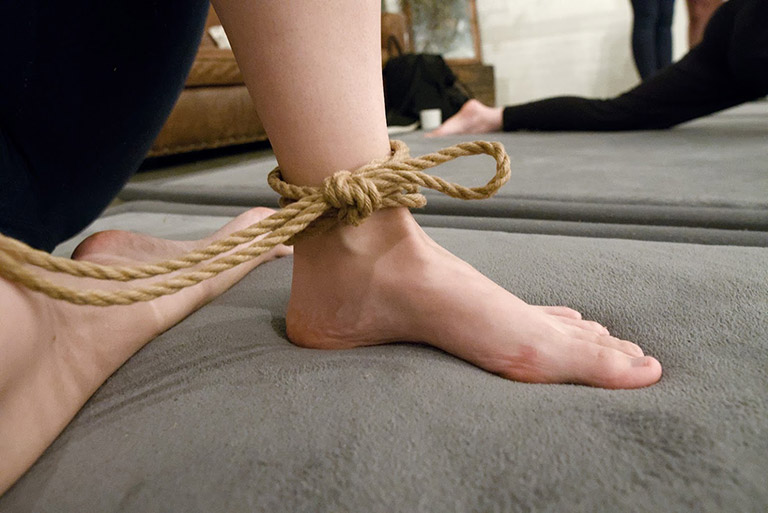
When doing your wraps for the starting single column tie, position the bight towards the foot with the working end of the rope able to wrap up the leg. The way that you tie the knot will determine the direction that the rope will wrap around the leg.
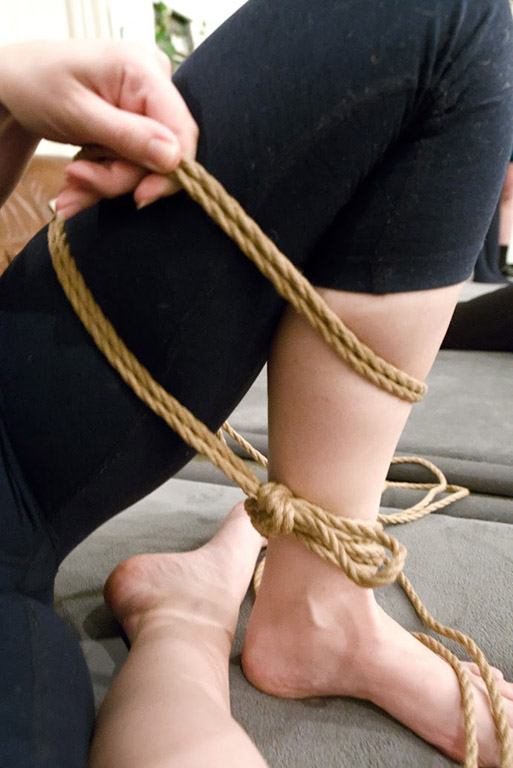
In the pictured example instance the rope is spiralling up the leg beginning with the inside thigh. To achieve this, you need to have wrapped the original single column tie in the opposite direction. If you have tied it in the wrong direction, it’s best practice to untie the single column tie and try again. Eventually you will be able to wrap the right way without having to think about it.
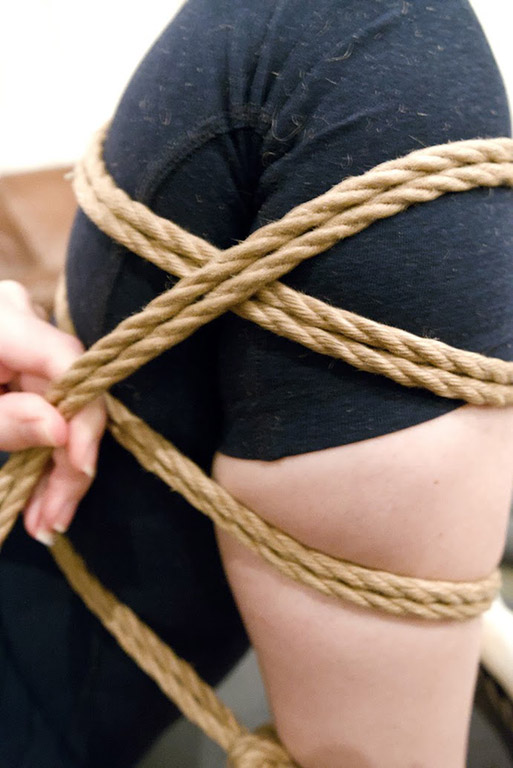
When tying the futomomo tie, you need to maintain an even tension on the rope as you wrap. And especially as you begin to make the hitches and frictions that keep everything in place.
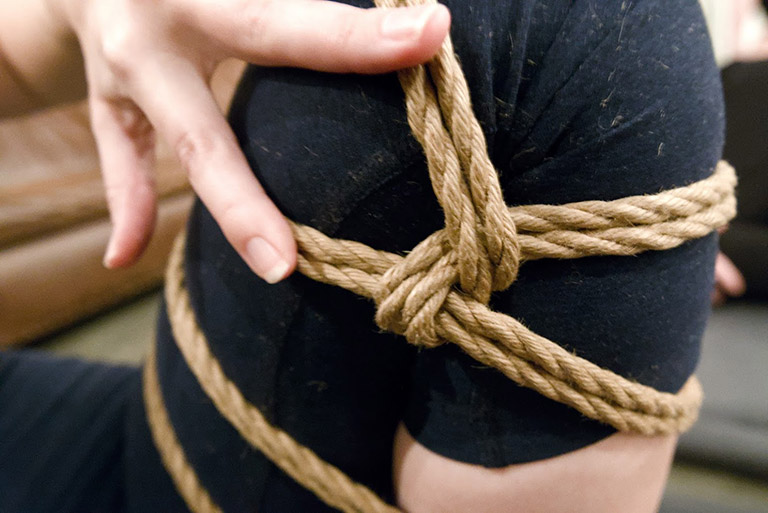
The hitch pictured above is the first friction point of the tie. Its job is to keep tension and help direct the working end down the spiral. This hitch passes over the spiral, wraps around the rope near the knee, and then twists back under the spiral. You will know that you have done it correctly because it will lock into place and won’t slide along the spiral too easily.
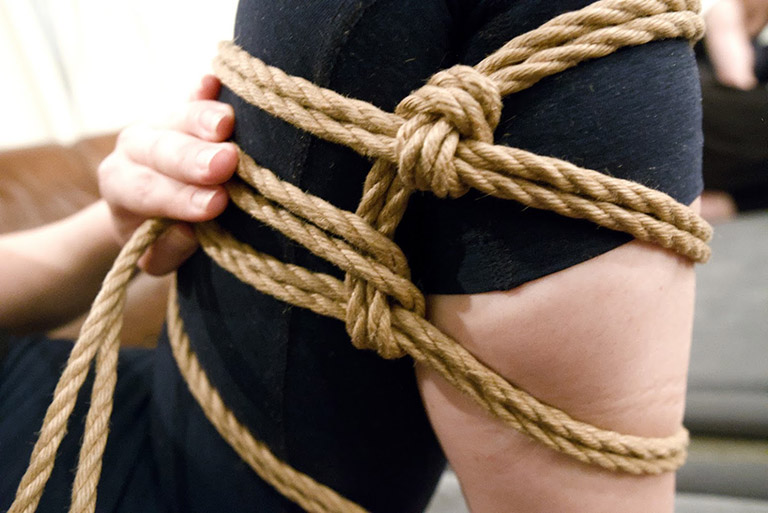
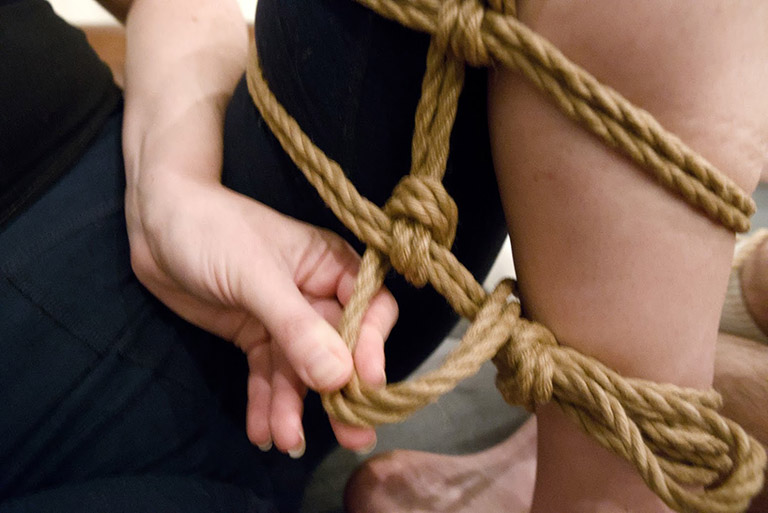
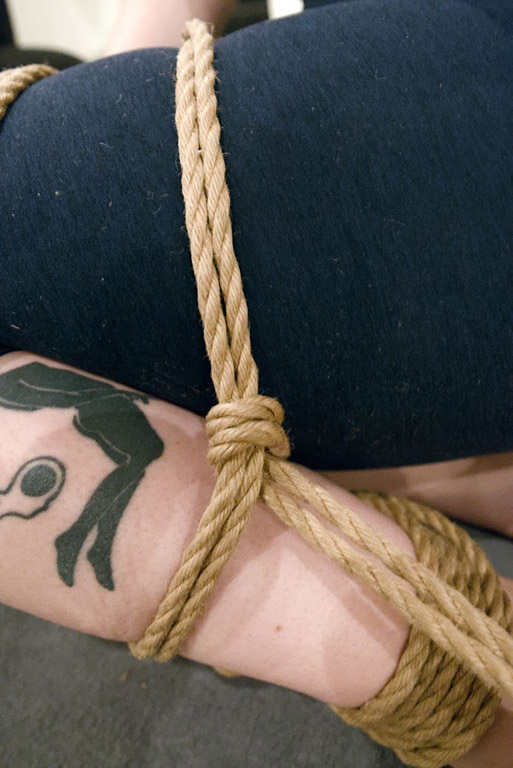
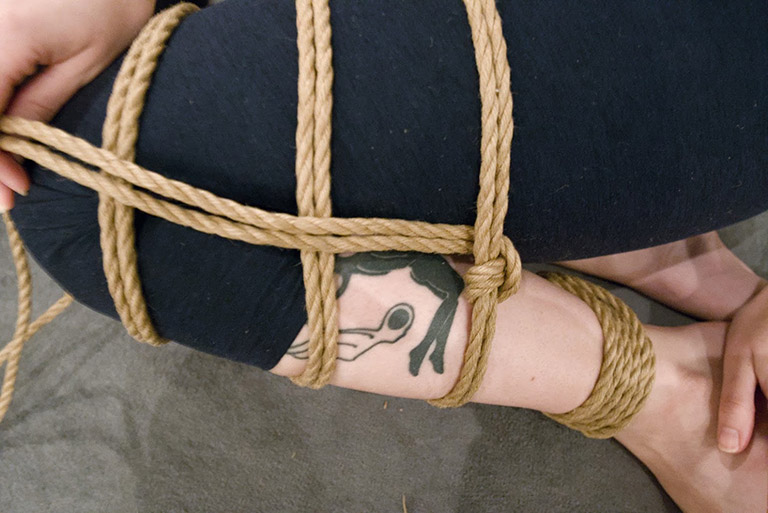
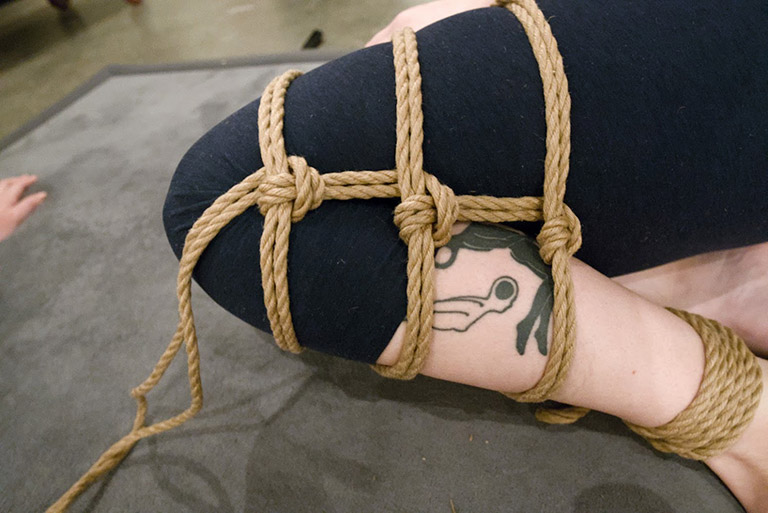
At the top of the tie you may be left with what is colloquially known in the shibari world as “homework rope”. This is the rope which you have left over after doing all the structural ropework. In this instance we spiralled the rope back down the way it came, embellishing the hitches further.
A little tied up, in the best way
Who knew a few metres of rope could offer so many possibilities? Whether you’re drawn to the beautiful, intricate designs, the thrill of giving up a little control, or simply looking for a new way to spice things up, shibari has something for the curious. It can be artistic, erotic, playful or a little bit of everything. And while you don’t need to be a master of knots to get started, a little patience, plenty of communication and a willingness to learn go a long way. Perhaps the real beauty of shibari is that there’s no single way to experience it, only the freedom to explore what feels good to you.